 Download
If you stream with alerts, chat, goals, sponsor graphics and a webcam, your live scene is built for viewers—not necessarily for a clip you want to edit and post later. The usual frustration is simple: you save a great replay, then discover the gameplay is permanently covered by the same overlay elements that made sense on stream.
The practical answer is to separate your broadcast output from your clip asset. You can do that inside OBS with carefully managed scenes and recording routes, or use a replay workflow that preserves the gameplay and camera as separate material when you save the moment. The better choice depends on how much setup and post-capture flexibility you need.
Why OBS replay clips often include everything on your stream
OBS Replay Buffer saves the output it is configured to record. If that output is your normal stream scene, the saved replay can include the gameplay, webcam, alerts, overlays and any other visible scene elements. That is useful when you want an instant shareable stream-style highlight. It becomes limiting when the same moment needs a clean YouTube edit, a vertical social clip or a version where the facecam needs moving.
Once an overlay has been baked into a finished video, it is part of the picture. You can crop around it, cover it with another graphic or use more advanced cleanup techniques, but you cannot simply switch it off afterwards. The same applies to a webcam that obscures a HUD, subtitles or an important part of the action.
So the goal is not necessarily “OBS replay buffer gameplay without overlays” in the literal sense. The goal is to keep your live presentation running while also retaining a clean version of the underlying material for the clips worth working on.
Option 1: Build a separate clean recording scene in OBS
The most direct OBS approach is to maintain two versions of your content: one scene for the broadcast and one for clean capture. Your stream scene contains the full presentation, gameplay, camera, overlays and alerts—while the clean scene contains only the elements you want in a clip, usually gameplay and perhaps a camera without the surrounding graphics.
- Create a broadcast scene with your normal gameplay, webcam, alerts and branding.
- Create a clean scene that uses the same gameplay source but leaves out stream-only overlays.
- Keep source transforms consistent where that matters, so you do not accidentally capture a different crop or scale than intended.
- Configure your recording or replay workflow around the clean scene rather than assuming the stream output is automatically suitable for editing.
- Test a short saved replay before a real stream. Check game audio, microphone audio, webcam framing and whether any alert or browser source has leaked into the saved file.
This can work well if your desired clean clip is straightforward and you are comfortable maintaining scene collections, source duplicates and routing choices. It is particularly useful when the final clip can be a single composed video with no need to change the layout later.
The drawback is operational complexity. Every change to your stream presentation can create another point to check in the clean capture setup. If you move the webcam for a special event, add a temporary sponsor panel or change a game capture crop, you need to know which version should follow that change. It is easy to get the live scene right and only notice after a good moment that the clean replay was not configured as expected.
Option 2: Record a clean feed separately from the live broadcast
A more flexible version of the OBS approach is to record clean gameplay separately while streaming the fully composed scene. Depending on your setup, that may mean a second OBS output path, additional recording tools or a plugin-based source-recording workflow.
This reduces the risk of stream branding being permanently embedded in your clip footage, but it adds resource and workflow considerations. You need to monitor what is being captured, where files are saved, how audio is routed and whether the extra recording load is acceptable while gaming and streaming. It can also leave you with long recordings to search through if your clean capture runs for the entire broadcast.
This route makes sense for creators who already have a stable OBS production system and want complete control over their routing. It is less appealing when the real requirement is simply: save the last good moment, keep the stream untouched, and decide later how the clip should look.
A cleaner replay pattern: save the moment, preserve the sources
A source-preserving replay workflow takes a different approach. Instead of choosing between a live-style composite and a clean composite before the stream, it can save the replay while retaining the original captured inputs separately. That means the gameplay and webcam do not have to be permanently fused into one image at the point you save the highlight.
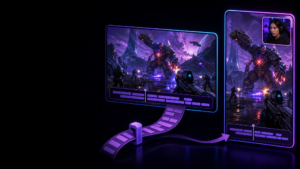
With Cutscene Replay, you can build a profile with gameplay, a webcam and computer playback audio, then save a replay when a worthwhile moment happens. When editable source footage is enabled, Cutscene can retain independent source recordings alongside the replay output. In practical terms, you can keep the stream overlay in your live broadcast workflow while preserving gameplay and camera material that remains available for later adjustment.
That distinction matters most for clips that are more than a quick repost. You may want the gameplay full-frame for YouTube, a different camera position for a vertical cut, or no camera at all during a key gameplay sequence. A flattened replay forces those choices early. Independently preserved visual sources let you make them after you know the moment is worth editing.
Cutscene Replay is not a replacement for OBS as a live production tool. OBS remains a strong fit when your priority is building and delivering a live broadcast. The relevant difference is that Cutscene can sit beside that broadcast-oriented setup as a replay capture workflow designed to keep the clip asset more flexible.
What this looks like during a stream
- Run your normal OBS stream scene with the overlays, alerts and webcam layout your audience expects.
- Use a replay capture profile that includes the inputs you want to preserve for clips, such as gameplay, camera and system audio.
- When a good play, reaction or funny exchange happens, save the recent replay rather than searching through a full-session recording.
- Use the compiled replay when it is already good enough to share.
- For the clips that need work, open the preserved source material and adjust the gameplay or webcam composition instead of trying to undo a baked-in stream layout.
This is especially useful when your live scene is deliberately busy. A webcam may be placed low to avoid covering gameplay during a stream, while a vertical clip may need it above the action. A follower alert may be welcome live but distracting in an evergreen highlight. Separate source material gives you room to make those editorial decisions without asking your live viewers to watch a stripped-back scene.
Which setup should you choose?
- Use one OBS replay output if you mainly want fast stream-style highlights and do not mind overlays, alerts and webcam placement being permanent.
- Use separate OBS scenes or outputs if you are comfortable managing a more technical setup and know exactly what your clean recording should look like before you go live.
- Use a source-preserving replay workflow if you want to keep your normal live scene but retain gameplay and webcam material that can be reframed after a highlight is saved.
For many streamers, the third option removes the awkward compromise. You do not have to make the live broadcast look like a raw recording, and you do not have to treat every saved highlight as a final edit. Cutscene Replay captures multiple sources in one profile and can optionally save independent visual source recordings, so gameplay and facecam can be edited individually after capture.
If your bigger issue is turning those clips into vertical posts without losing important gameplay, see how to make vertical gaming clips without cutting off the action. If you need a clearer view of how separate sources can be handed into deeper editing, this replay capture workflow for DaVinci Resolve and Final Cut Pro covers that next step.

Keep your stream layout and keep your clips flexible
Try Cutscene Replay to save highlights after they happen while optionally preserving gameplay and webcam sources for cleaner edits later.
The key principle: do not bake in decisions you may need to change
Stream overlays are presentation choices. They help a live audience understand what is happening now, but they are not always the right choices for a clip that could live on a different platform weeks later. Keep the broadcast scene optimised for the stream. Keep your clip workflow capable of preserving the moment cleanly enough to make a better decision afterwards.
That is the real fix for the clean-gameplay problem: not hiding your overlays from viewers, but avoiding a capture setup that makes those overlays impossible to escape when a great moment deserves a proper edit.