 Download
If your facecam is covering the minimap, subtitles, inventory or the best part of a reaction, whether you can move it after recording comes down to one question: was the facecam saved separately from the gameplay?
If it was baked into one finished video, you cannot truly drag it to a new position. You can crop, blur, cover or sometimes reconstruct the blocked area, but the pixels behind the camera are gone. If gameplay and webcam were recorded as separate source files, though, you can resize, move, hide or reframe the facecam after the moment happened.
That distinction is why Cutscene Replay is useful for creators who make clips while playing. Its optional Source Footage workflow can retain eligible visual inputs independently alongside the normal replay clip, so a bad facecam placement does not have to ruin an otherwise great highlight.
Can you move a facecam after recording?
Yes, but only when the recording still contains separate visual layers or source files. Think of your recorded clip as either a flattened image or a small editing project.
- Flattened recording: gameplay, facecam, overlays and sometimes alerts have been combined into one video. The facecam position is permanent.
- Separate source recording: gameplay and webcam exist as independently editable media. You can change the layout in an editor after recording.
- Project file with linked sources: the camera may be movable if the original media and project are still available, even if you also exported a finished version.
Most quick recording workflows produce the first kind: a finished file with everything composited together. That is convenient for immediate sharing, but it limits rescue options later. Separate-source capture takes a little more planning and storage, but gives you control when a highlight turns out to be worth polishing.
What to do if the facecam is already baked into the video
A baked-in facecam cannot be cleanly repositioned because moving it exposes an empty area rather than the gameplay that was hidden underneath. Your goal is usually to make the clip watchable, not to recover information that was never recorded.
Use a tighter crop when the blocked area is unimportant
For a short-form clip, you may be able to crop the frame so the facecam sits closer to an edge or is no longer visually distracting. This works best when the important action is central and the original recording has enough resolution to tolerate the crop.
Cover the facecam deliberately
A caption, meme graphic, callout, scoreboard-style element or branded overlay can make the placement feel intentional. Do not use this to hide crucial game information; viewers will still notice if the camera covers a kill feed, dialogue choice or objective marker.
Cut around the obstructed moment
If the facecam blocks only a brief section, remove that beat, shorten the clip, or use a reaction-focused edit where the camera is part of the point. A strong 20-second highlight is usually better than a longer clip that leaves viewers confused about what happened.
Rebuild from another recording only when you have matching footage
If you recorded the same match from another angle, captured a replay in-game, or have a clean VOD section, you may be able to insert replacement footage. This can work, but synchronising it is more effort than simply retaining the camera separately in the first place.
The better workflow: preserve gameplay and facecam as separate sources
For clips you may edit later, capture a normal ready-to-use highlight and keep editable source footage when needed. You still get a fast file for sharing, but you are not locked into the exact composition you chose during a tense game or stream.
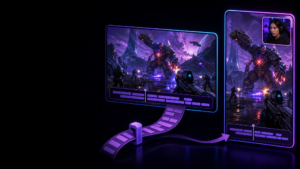
With Cutscene Replay, you can optionally save independent source media and a capture manifest alongside the flattened replay output. Eligible visual inputs are retained separately, so the gameplay and webcam are not permanently fused into a single image. When source media is available, Cutscene’s editor can reconstruct the capture from those original tracks in Source Footage mode.
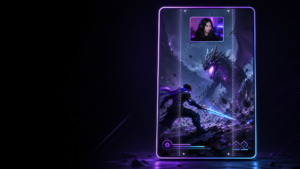
In practical terms, that means you can open a saved moment, select the webcam source, then reposition and resize it without moving the gameplay itself. If the camera covers your HUD, move it to a quieter corner. If your reaction matters more than the full game view, make it larger for that specific clip. If the reaction adds nothing, remove it from the edit altogether.
This is different from applying a crop to a completed video. You are changing the composition of original components before the final export, rather than trying to repair a single flattened frame.
How to reposition your facecam in Cutscene Replay
- Enable source preservation before you capture. In your recording setup, choose the option to retain editable source footage for replays you may want to refine later. Make sure gameplay and webcam are included as eligible visual sources.
- Capture the highlight as normal. Save the replay after the moment happens. You can keep the normal compiled clip for a quick post while preserving the source package for edits.
- Open the replay in the built-in editor. When valid source media is present, work in Source Footage mode so the edit is built from the original tracks.
- Select the webcam source. Move it to a clear corner, resize it, or reframe it around the reaction you want viewers to see.
- Check gameplay readability. Scrub through the clip and make sure the webcam does not cover changing UI, captions, kill feeds, chat prompts or key action.
- Export the revised clip. Your final video has the new facecam placement while the underlying gameplay remains intact.
The important part happens before the clip exists: you decide to keep the editable sources. Once that is enabled, the replay can serve two needs at once—fast capture for spontaneous moments and more flexible editing if the moment deserves a second pass.
When changing the facecam position makes the biggest difference
Not every clip needs a camera move. It becomes valuable when the original live layout was designed for streaming rather than for a standalone highlight.
- The HUD moves during gameplay. A facecam that is safe in one game mode may cover an objective, map or status panel in another.
- You are making a vertical version. A landscape stream layout often leaves the camera in a place that does not work once the clip is reframed for phones.
- The reaction is the story. You may want the facecam larger for a funny fail, jump scare or win reaction, then smaller for action-heavy moments.
- You want a cleaner montage. Removing the facecam can make a mechanically impressive sequence easier to watch.
- You need a different visual hierarchy. Tutorial clips may need the game unobstructed, while personality-led clips may benefit from a more prominent camera.
For platform-specific framing, separate sources also prevent you from treating one finished stream layout as the only version of the moment. If you are also creating vertical clips, see how to make vertical gaming clips without cutting off the action for framing considerations beyond the facecam itself.
Plan facecam placement without overthinking every recording
You do not need to rebuild your scene before every game. Start with a sensible default layout, then protect yourself against exceptions.
- Keep the camera away from areas where your game regularly places maps, health bars, objectives and subtitles.
- Leave margin around the frame instead of pinning the facecam tightly into a corner; it gives you more room for later crops.
- Avoid putting essential overlays behind the camera.
- Treat captions and facecams as separate layout decisions. A camera position that works in a stream may conflict with subtitles in a short clip.
- When a game has an unusual HUD, save a replay test and review it before a long session.
A safe-zone plan helps, especially across formats. This guide to gameplay clip safe zones for captions, facecams and overlays can help you choose a better starting position. But source preservation is the fallback that lets you fix the clips that do not follow the plan.
Separate visual sources also make audio and editing decisions easier
The same principle applies beyond the facecam. A highlight is more editable when its important parts remain independent. Keeping source footage can let you adjust visual framing after capture, while separately captured audio can make it easier to rebalance your microphone and game sound before publishing.
If you want to build a more flexible clip workflow, compare instant clips with editable source packages to decide when the extra source files are worth keeping. For creators who caption gameplay, a clean microphone track can also make transcription and timing easier to manage.
Do you need a professional editor to do this?
Not necessarily. For practical changes such as moving, resizing or removing a facecam in a replay, Cutscene Replay’s integrated editor is designed to take you from captured moment to revised clip without first assembling separate recordings by hand.
For a larger production—multi-scene storytelling, advanced colour work, extensive effects or a longer YouTube edit—you may still prefer a professional non-linear editor. The useful distinction is that preserving source footage keeps that option open. You are not forced to choose between a quick clip now and flexibility later.

Keep your next facecam mistake editable
Try Cutscene Replay to save spontaneous highlights while optionally retaining separate gameplay and webcam sources for post-capture reframing.
The bottom line
You can move a facecam after recording gameplay only if the camera and gameplay were preserved separately. If they were baked into one video, your options are limited to cropping, covering or cutting around the problem.
For future highlights, record with flexibility in mind. Cutscene Replay can retain independent visual source recordings alongside a normal replay clip, then let you edit from those original tracks in Source Footage mode. That means a misplaced facecam can become a quick layout adjustment instead of a lost clip.